The individual users are managed here. As an administrator, you can add new users, edit existing user information or delete existing users.

Add users
Add User
- Click on the button: “Add”.
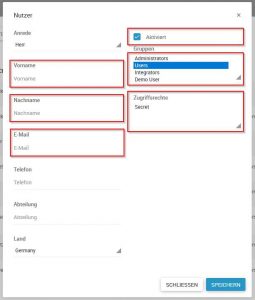
- Then the user editor opens, in which you can enter the user data and make various settings.
- Fill in the displayed fields with the appropriate information. The fields marked in the figure should always be filled in or selected. By giving the user a name, the user is clearly identifiable.
- The e-mail address is required, as the user receives an e-mail immediately after saving, with which he can confirm his registration and set his password.
- Also define whether the user is active and what role and access rights he or she should have. A detailed role description follows in the next section.
- Then confirm the process with “Save”.
Add a new user
Edit user data
You can also edit the data and settings for existing users. To edit the data for a user, select the pen icon in the list of the respective user.
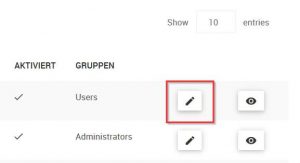
Editing user data
Then the user editor opens as you know it from adding a new user. The previous user data is stored there, which you can now edit and save.
To edit the configuration for several users simultaneously, select these users by checking the checkboxes in front of their names.
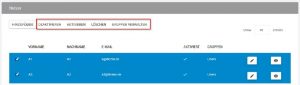
Edit configuration for several users
You can now enable, disable or delete all selected users from the system. You can also assign roles or remove roles. To do this, select “Manage groups”.
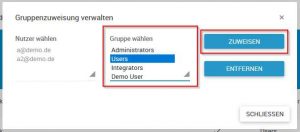
Manage groups for multiple users
The selected users are now displayed. You can select the desired group to assign to or remove from users.

